Securing Your Django Admin: A Comprehensive Guide to Creating a 2FA Security System for the Django Admin Panel
There was an era where atomic and nuclear weapons were considered the most destructive paraphernalia and no doubt they are, but the era has changed and so has the definition of the most destructive weapons. Now, the clock of destruction ticks one and only one sound 'Data, Data and Data'. In an era where online security is paramount, protecting sensitive data is not just a good practice but a necessity. Django, a high-level Python web framework, comes equipped with a powerful admin interface that simplifies the management of your application. Commonly known as the Admin Panel, is, by default, secured by Django's authentication system that requires a combination of username and password associated with a superuser to login. As per the name suggests, Admin Panel provides control over sensitive and critical data such as User information, such as credentials and access restrictions to the users and may also contain sensitive company data.
Despite the robust and secure design of the administration panel, the admin panel is not immune to cyber attacks. Access based on a minimal username and password combination isn't enough. To add an extra layer of security and fortify our defences against unauthorized access, implementing Two-Factor Authentication (2FA) in Django's admin panel is a prudent step forward. In this article, we will see the step-by-step process of setting up 2FA in Django admin, enhancing the security of your web applications and ensuring that only authenticated users with a second layer of verification gain access to critical admin functionalities. Let's delve into the world of heightened security and empower our Django projects with an additional shield against potential threats.
Before starting with the code, I'll give you an overview of the Django modules that we'll be using to get it done. We'll use django-otp and qrcode modules. django-otp is a Django module that provides utilities for adding Two-Factor Authentication (2FA) to Django applications. qrcode will allow us to generate QR codes that we can scan on different authenticator apps like Google Authenticator to generate and manage our tokens.
I guess, that's enough of the text, let's jump into the code and see how we can bring it about. As usual we'll start from level 0 (i.e) right from installing Django to seeing our thing up, working and shining. Let's gooooooooooooo!
pip install django
django-admin startproject admin2fa
#Once created, run the following
cd admin2fa
Now, we've our Django project ready to use. We'll just install the aforementioned things and see how we can implement them.
pip install django-otp qrcode
Once installed, we'll add them to our INSTALLED_APPS in our settings.py file.
INSTALLED_APPS = [
    ...
    'django_otp',
    'django_otp.plugins.otp_totp',
    'django_otp.plugins.otp_static',
    ...
]
We also need to add it to the MIDDLEWARE in the settings.py file. So, let's do it quickly.
MIDDLEWARE = [
    ...
    'django.contrib.auth.middleware.AuthenticationMiddleware',
    'django_otp.middleware.OTPMiddleware',
    'django.contrib.messages.middleware.MessageMiddleware',
    ...
]
In Django, the order of middleware actually matters a lot. They are applied in the order we keep them. That's the reason we've kept the
OTPMiddlewarebelow theAuthenticationMiddlewareThis thing is rarely explained, but let's understand it using a simple example. 2FA means Two-Factor Authentication. The first-factor is the combination of the username and the password. If and only if, the first-factor is passed, we move towards the OTP. I don't think any website asks for the OTP before giving the username and password combination. The first-factor if handled by theAuthenticationMiddlewareand when the request is passed successfully by it, then theOTPMiddlewareis used for the second-factor (i.e) The OTP related stuff.
Now, let's migrate the database changes.
python manage.py migrate
You'll see some satisfying things happening in the terminal if you've correctly followed the steps, else you'll see some horrible errors running through the terminal to your mind.
Now, we'll create a superuser using the following commands and setup a TOTP device. TOTP refers to Time-Based One-Time Passwords (TOTP). The OTPs that expire in some time. Y'all might have used them. We'll go to the admin panel and follow the following steps.

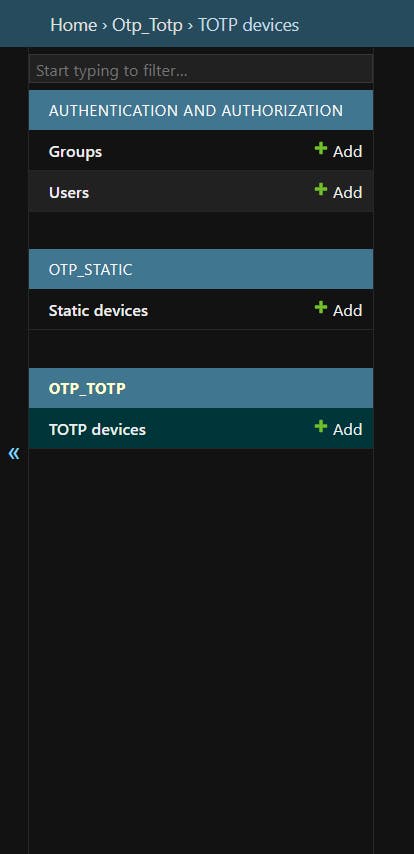
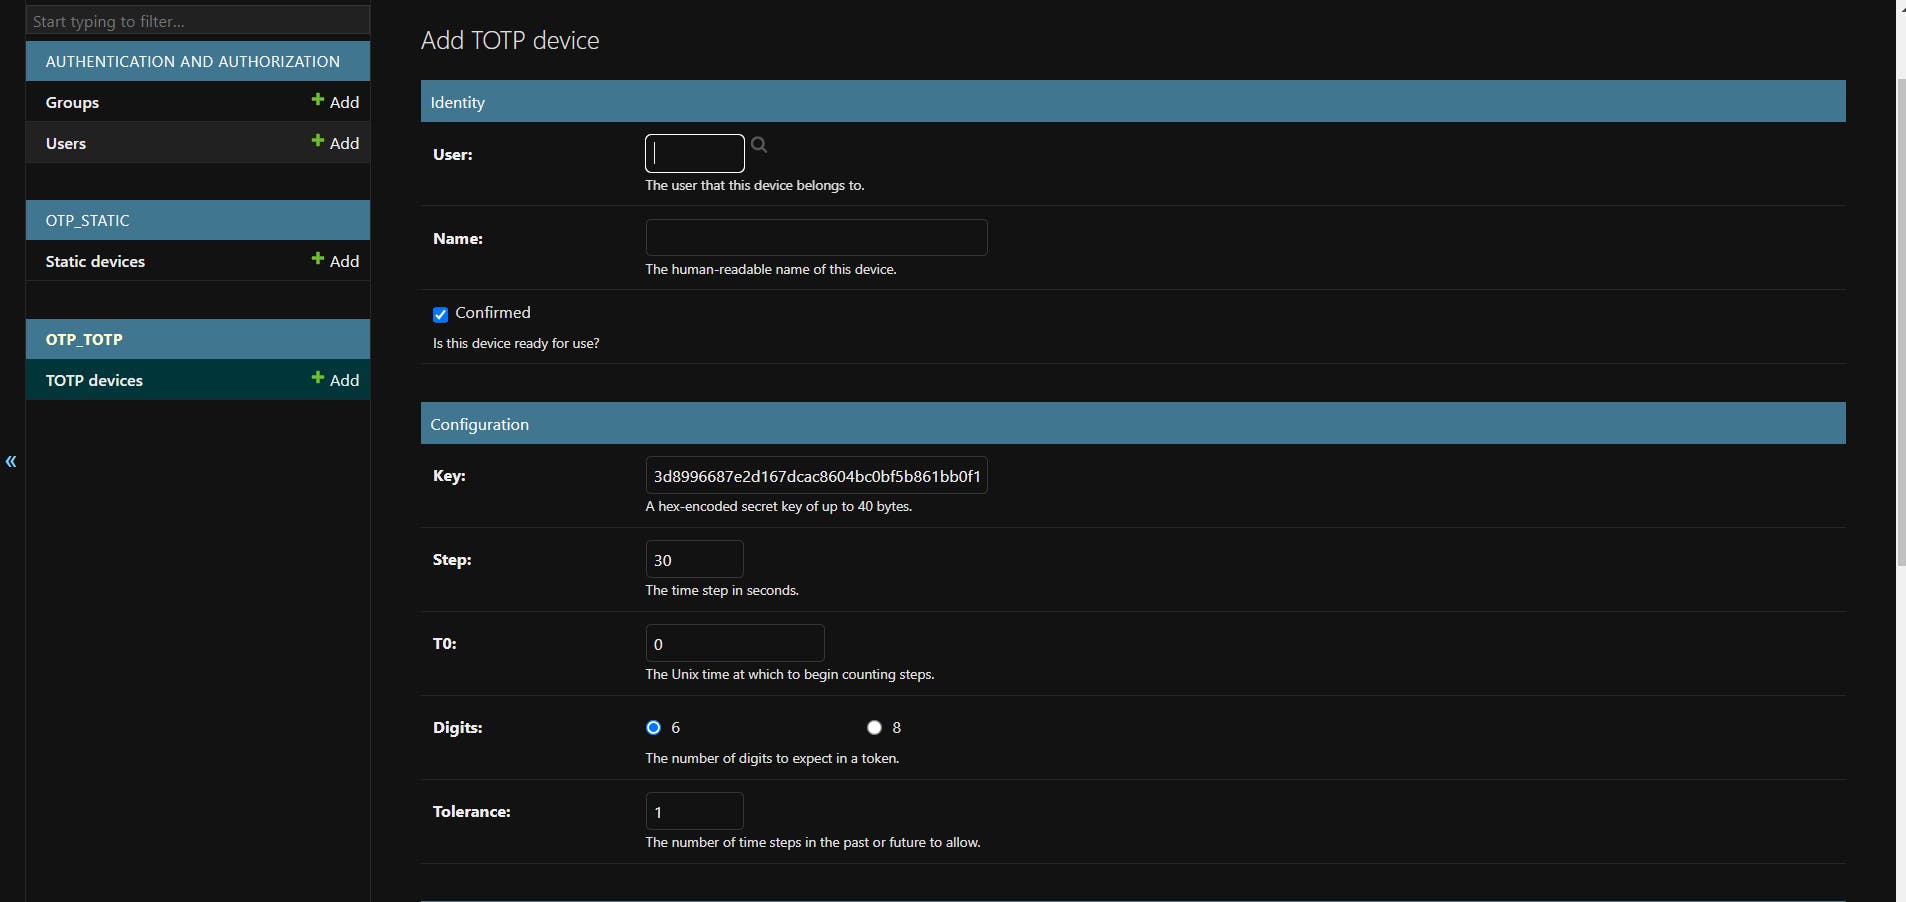
We'll see this on the left side of the admin panel. We'll just click on Add button in the TOTP Devices option and we'll be able to see this in the main section of the admin panel.

Here we'll add a device for the admin user. Just click the search icon besides the User input box to select the admin user you want to setup the device for. Name the device and save it. Once saved, we'll see the following thing screen.

Here we will click on the qrcode, which will, for us, generate a QR code, which we have to scan in the application we use to manage our OTP tokens.
What do you say? Are we good to see 2FA up for us. Think about it.
No, we ain't. We still have to specify that the admin site is of the OTP Class type, so that when we try to access it, it prompts you to enter the token. So, for that, we'll add the following code to the urls.py file of our project.
from django.contrib import admin
from django.urls import path
from django.contrib import admin
from django_otp.admin import OTPAdminSite

admin.site.__class__ = OTPAdminSite

urlpatterns = [
    path('admin/', admin.site.urls),
]
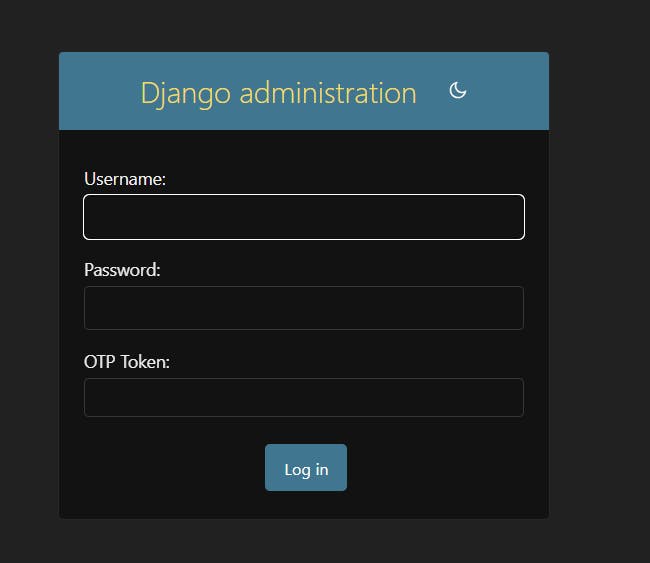
Now, when we try to access the admin site, we'll be prompted for the OTP token as shown in the below image.

In the OTP Token field, we have to enter the OTP generated by our authenticator application.
We're good to use it and show it out to anyone now.
Choose a secure and trusted authenticator app to manage your tokens. Also, keep your tokens secure with you.
Keep learning, Keep Sharing, Keep Djangoing!
Peace, Dot!
